

Anthotyping with Bearded Iris pigment and Kunzea bush
Art this Week
I love a good art retreat, even if it is online. This past week I participated in the Isles of Curiosity and Wonder Midsummer Create Retreat from Anna Brones’ Creative Fuel Substack. I enjoyed it thoroughly despite the fact that it is Winter in Australia and has been bitingly cold here. I have participated the past few years and I find it fun and inspiring….you should check it out! Anyway, it helped me get motivated to do some anthotype printing - a process using light-sensitive plant extracts to produce a picture (similar to cyanotyping if you know of that).
The plant pigment needs to be what is called ‘fugitive’, meaning it is not colorfast, so it will fade in the sun (I feel a better word might be ‘ephemeral’ color). As I started looking around outside for something to use, I saw the bearded irises in the garden just outside the kitchen window, so I started with them. And who just wants one color when you can modify your plant pigment with various household solutions to produce several different ones?

top left: bearded iris, no modifier; bottom left: iris with detergent (basic modifier); middle: iris with alum (brightener); right: iris with flecks of lemon juice (acid modifier)
This idea came from a course/workshop I recently took through the Plants & Colour website (which I LOVE!). The instructor used spinach from the garden to produce her anthotype example. I thought I should do that, too….go out to the garden and pick fresh spinach - both for breakfast and for the art, but it was so cold that morning, I didn’t want to venture beyond the back herb and flower garden.
The process goes like this:
crush up your chosen plant to release its pigment in a mortar & pestle
pour your plant matter through a piece of cheesecloth to capture all the bits and collect the liquid into a bowl
paint good-quality paper with the plant pigment - go over it a few times until there is no pooling of the liquid
at this point you can modify the color by adding very small amounts of various acids and bases you have around the house like detergent, lemon juice or vinegar (iron-water or copper-water if you are a dyer and have these ready)
allow the paper to dry; if you have extras that you won’t use right away store them in a box to keep the light off of them
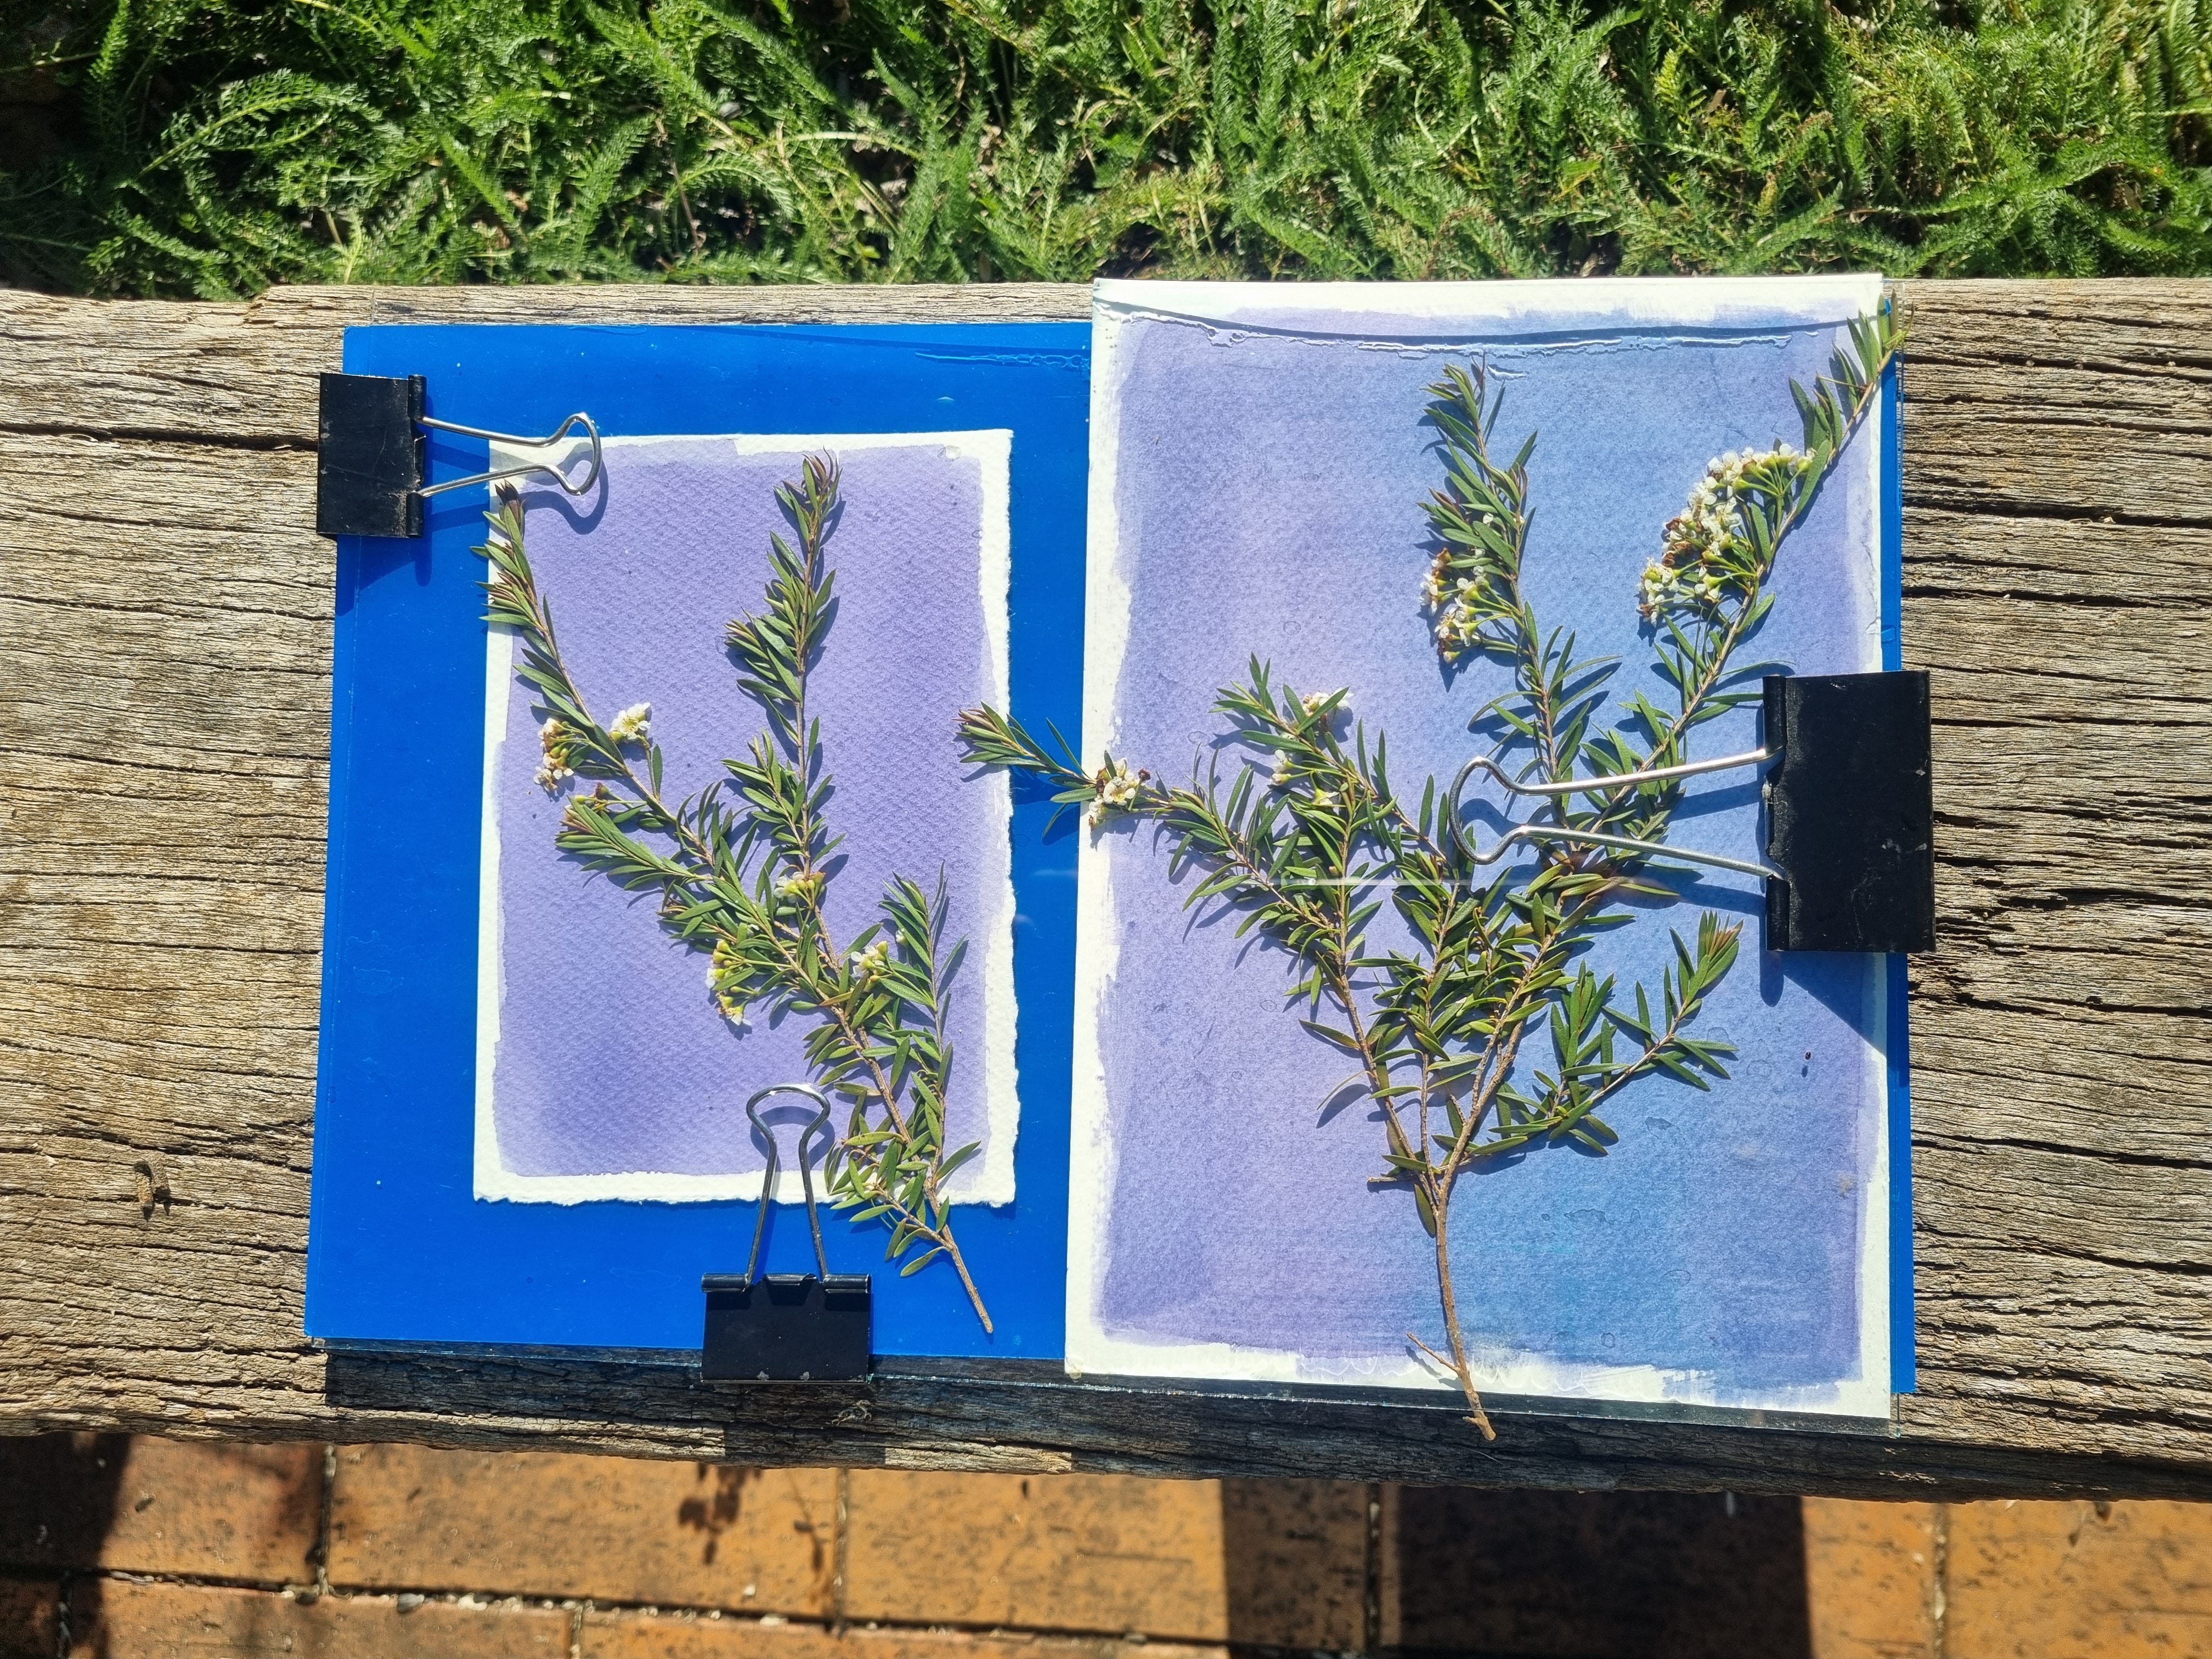
find an old picture frame for the glass and backing, and some bulldog clips - place the paper with the item you want to ‘photograph’ on top of it on the backing of the picture frame, put the glass on the top and secure it with the clips
place this in the direct sun until the color fades to the point you like the look of it - this could take either a few days or many days (you may want to take it inside overnight so it doesn’t become damp)
take it apart and you will find a picture left underneath in the original color
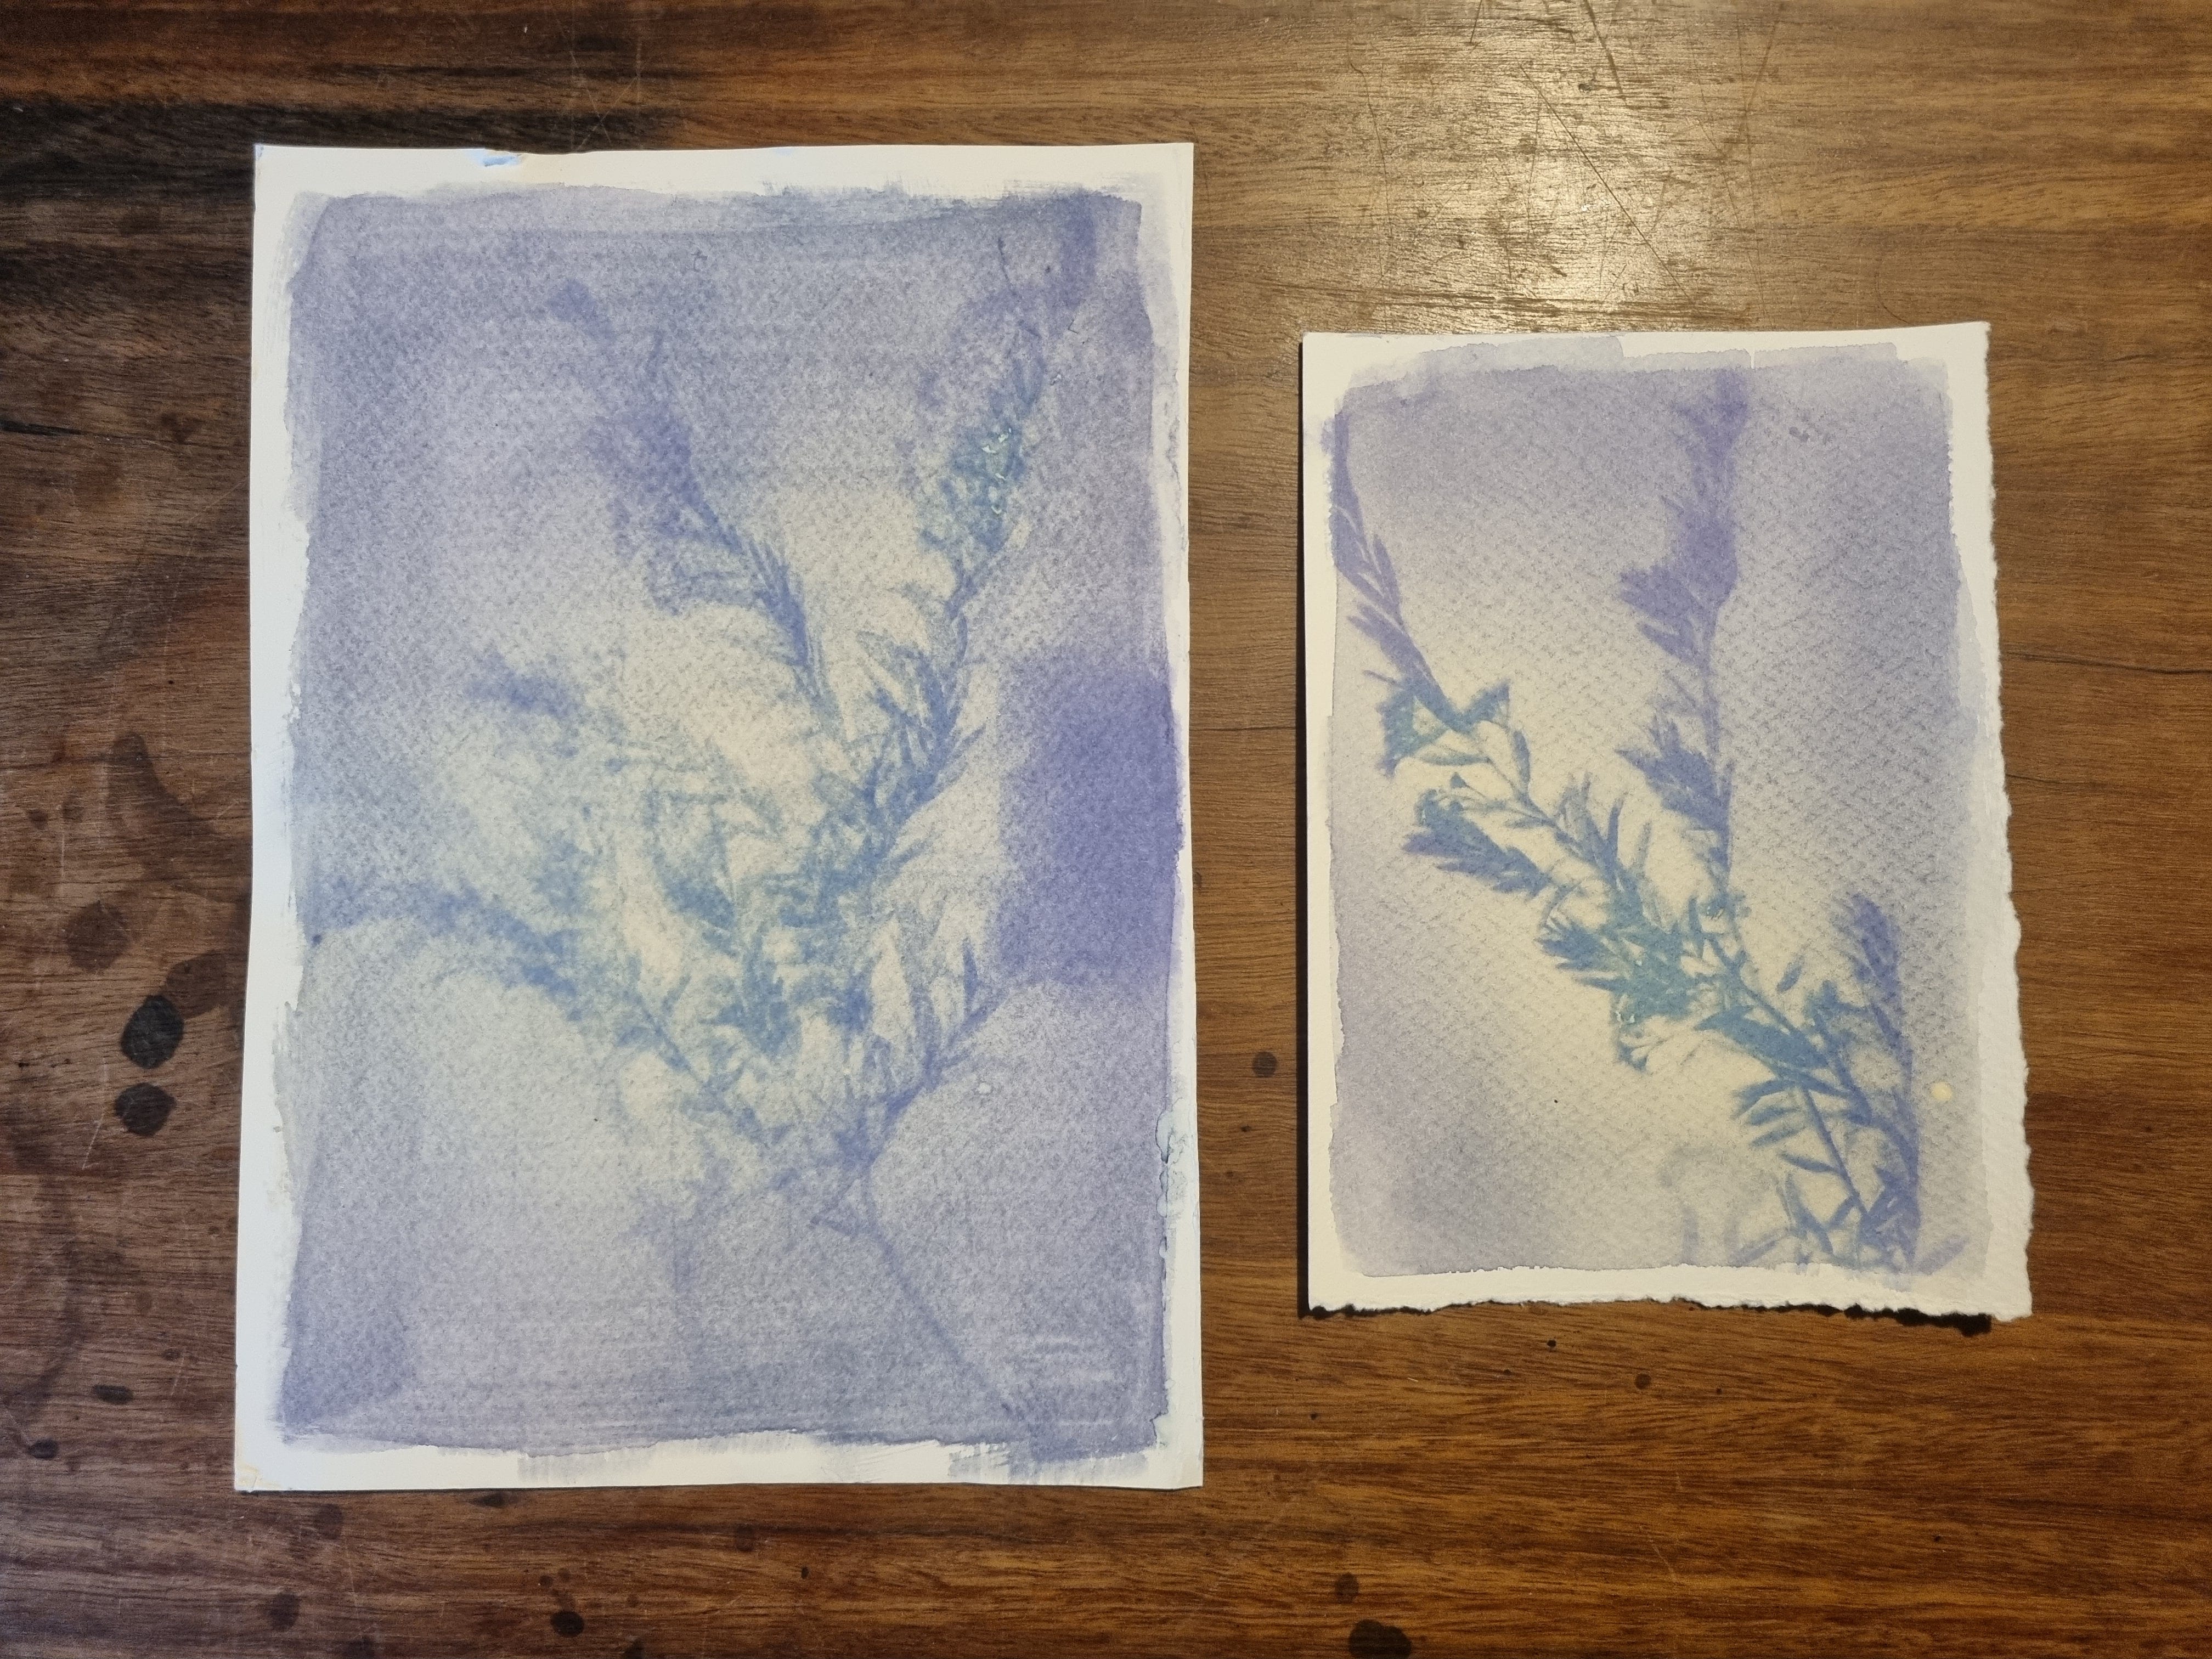
final product - the one on the left has a square on the right side where the bulldog clip was (don’t make that mistake), but the one on the right came out nicely
Embroidery and Darning
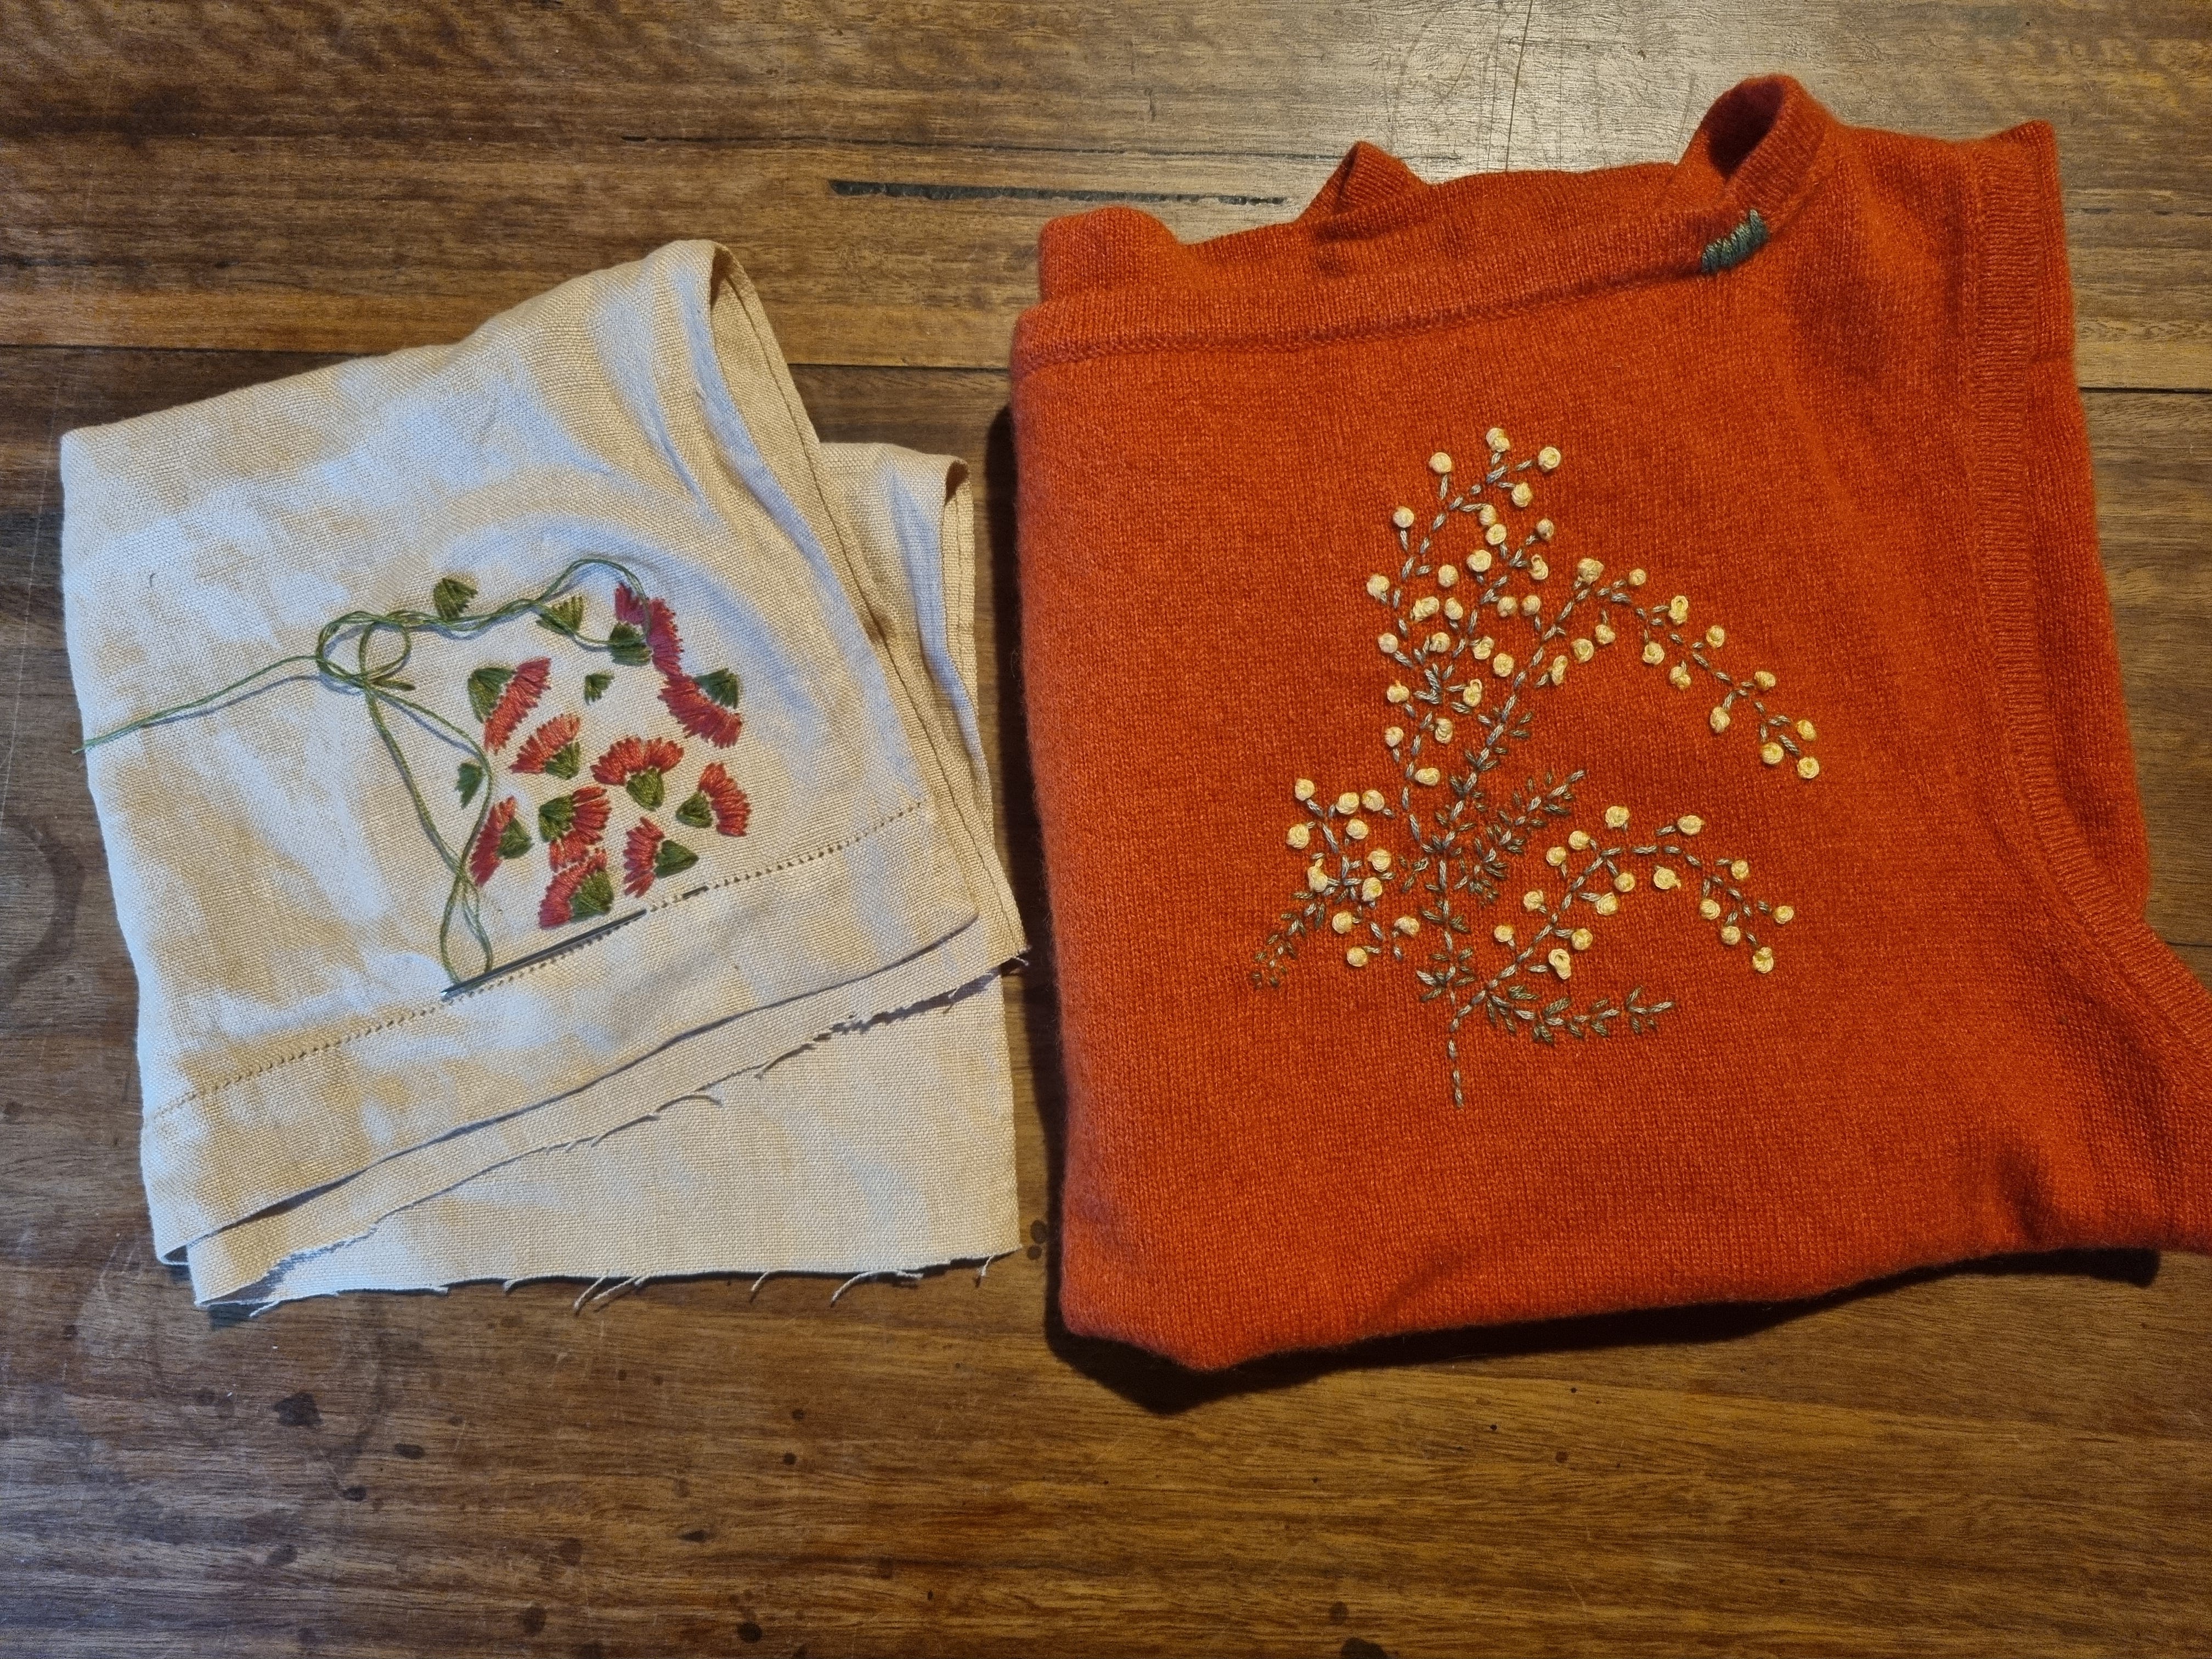
I have been trying to keep up with my Winter mending/darning…there always seems to be so much to fix!!
I am also working on some embroidery - Australian flowering gumnuts on a piece of linen cloth I dyed from eucalyptus last Winter. My daughter is teaching me to crochet - I may have made this statement here before, probably last Winter. I am apparently a very slow learner when it comes to crochet probably because I didn’t learn a s a child. Anyway, I will persist…..
Cooking This Week
I didn’t feel much like cooking this week, and I have a lot of other things to focus on right now, so I stuck with things that are easy to prepare, yet tasty and satisfying, making sure to cook large batches so I didn’t have to do it again too soon.
We started last weekend off with Bolognaise on Fettuccini Alfredo and steamed cauliflower on the side. I also made fresh yogurt in two different flavors - apple syrup & cinnamon and lemon, vanilla & honey. For a quick desert I made Apple & Quince Pie by pouring a jar of preserved apple and quince sauce into a pie dish and covering it with pastry - very quick and easy to prepare (and easy to eat, too). Once the Bolognaise ran out, I made Greek Lentil Soup with fresh bone broth (chicken). It makes a huge amount so we will keep enjoying the soup for another meal or two.
Flavored Yogurt:
homemade yogurt, strained for at least 4 hours
cinnamon and apple syrup (or maple syrup or other sweetener of choice)
honey and the rind of one lemon, a dash of vanilla
Note: keep the whey for smoothies or to soak your chicken feed in.
Greek Lentil Soup recipe:
Sautee one large brown onion, diced, in olive oil until slightly browned. Add 2 diced carrots and a diced chili to the pot and cook until the carrot is just tender, stirring often so it doesn’t burn. Add 8 minced cloves of garlic, 2 teaspoons of salt, 1 teaspoon of pepper, 2 bay leaves, 2 tablespoons of chopped fresh oregano and 1 tablespoon of chopped fresh rosemary to the pot, along with 2L/8 cups of broth and 2 cups of rinsed red lentils. Bring to the boil, then reduce to a simmer and allow to cook until the lentils are done, with the lid on the pot.
While it is cooking, crumble feta cheese into a bowl and mix in 1 tablespoon fresh chopped rosemary and some pepper - this is to go on top of the soup when serving. Also juice 2 lemons and finely grate the rind of another.
Once the lentils are cooked, add the lemon juice and rind. Taste for salt and pepper (and more lemon), and adjust.
This recipe was given to me by a friend, so I can’t give credit to it, sorry. But I can say it is delicious and very reliable - I often take it to potlucks!
Interesting articles I’ve been reading that might interest you….
Nobody Has a Personality Anymore by Freya India
2025 - Sexuality and Love in the Era of AI by Mattias Desmet
The Language of the Master by Paul Kingsnorth
Resting Fallow, Going Analog-Digital Hybrid and Summer Reading by Ruth Gaskovski
Enjoy - Nx